UV Chopping for 3D Model Textures
So, Half-Life 1 is now 20+ years old. Yet I do believe it is pretty much still alive. The community is still working on custom mods and a lot of new content (maps, models, sounds etc. are still produced). When we speak about models however there are some limitations. For example, the texture size limits. In this tutorial, I will teach you a technique for splitting the UV maps for 3D models and editing the textures to match the new UV Maps. I call that technique: “UV Chopping”. This allows you to preserve the original quality of the large textures let us say a texture of size 1024x1024 or bigger.
Before we begin
So, let us speak about textures in Half-Life 1 Engine. The engine (and the compiler) does not support high-resolution textures. Below you can find the typical list of supported size for the textures:
1024x256; 768x384; 512x512; 512x384; 512x256; 256x256; 256x128; 128x128; 128x64; 64x64
So, let us say you have original model that uses 102x1024 or 2048x2048 textures... and you decide to compile it for Half-Life 1 ... The only way is to downscale the textures, thus losing quality... Now that would be a shame... Still there is a hope for you. In the below tutorial, I will show you a technique I call "UV Chopping". This will allow you to retain the quality of the hi-resolution textures in Half-Life 1. I plan to do a follow up tutorial, where I will show you how to "hack" / "swap" bones of already rigged models and to adjust the models to "fit-in" the new skeleton. (Probably I will use the model I will be UV chopping for this tutorial).
What are we going to need?
- A model and textures. I will use the Leet model and the texture from Counter-Strike Source for this example.
- MilkShape 3D 1.7.8 - You can use any other model editing program that convenient for you.
- PhotoFiltre Studio - Again you can use any other texture editing software.
Note: I like PhotoFiltre since it's quite easy, light and intuitive to use.
Ok let us start.
Disclaimer: This tutorial will not show you how to port models from Source engine, in other words I'm not going to show you how to decompile the Half-Life 2 .mdl, .vtf etc. files. If you decide to reproduce it you're more than welcome to acquire the models yourself, assuming you have parched the game on Steam.
Texture UV Chopping Tutorial for Half-Life 1 Engine
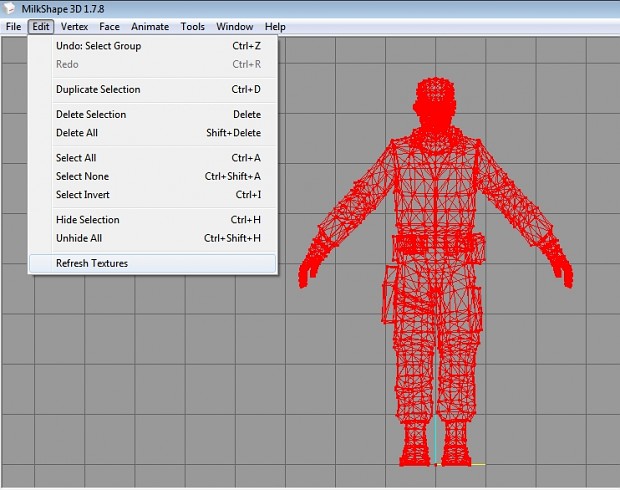
- Assuming you have your model, load the model in MilkShape 3D. Note: From now on I will reference the MilkShape 3D as MS3D.
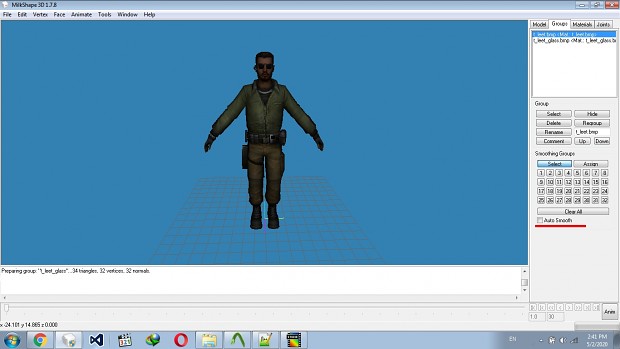
Figure 01: Model in MilkShape 3D
Make sure that when loading the model, you have no check on "Auto Smooth" (located in "Groups" section). If you have it ticked, you'll break the smoothing groups when you start to edit the model... and that's a pain to fix later (not that's impossible, but still why making our life hard...).
- Load the texture in PhotoFiltre. I have 2 textures 1 that's 128x64 (we can live with that...) and 1 that's 1024x1024.
There is no way to compile texture with this dimension in the normal Half-Life engine. (We'll not speak of XasH 3D here... sorry about that...)
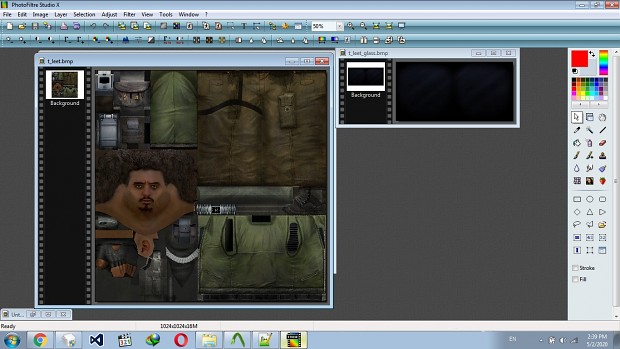
Figure 02: Textures review.
Looking at the texture t_leet.bmp I see some oportunities... For that texture if you look closely we see that we can "crop" it to 5 or 6 pieces:
pants; arm + bags; jacket; face; mix etc.
The possibilities are many. It's basically up to you to decide and to fit your needs. I will chop the texture in 6 (in the end we'll have 7 textures for the model).

Figure 03: Divide and Conquer (oops wrong book..)
- Go back to MS3D, go to "Groups" tab and select all the groups you have (I have 2); after this go to "Window" > "Texture Coordinate Editor" (or press CTRL + T) We will work in the Texture Coordinate Editor and in the main window for the MS3D.
My advise would be to also to change the projection to "Front" and the rendering to "Wireframe".
Hint: Click on the blue background and "Right" click to open the menu.
You should see something like this:
- Go to "Edit" > "Refresh Textures" - this will allow us to move different parts of the model (vertex by vertex). If you do not, you will still be able to move the vertexes, however they will pull other associated vertexes, and this is not convenient. Once again we are trying to make our job easier, not harder.
- Go back to the "Texture Coordinate Editor" and click on "Select" button. Now select only the "pants" part of the texture you see.
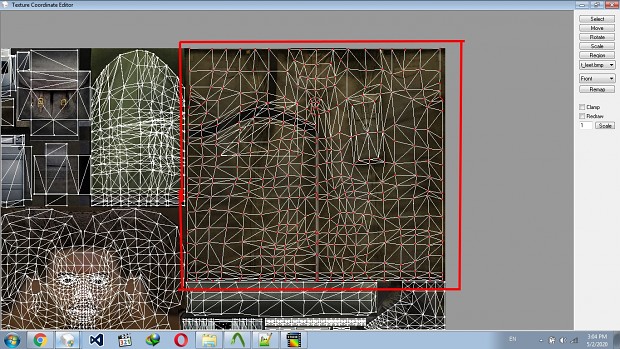 Figure 04: Selecting the "pants" part of the UV map.
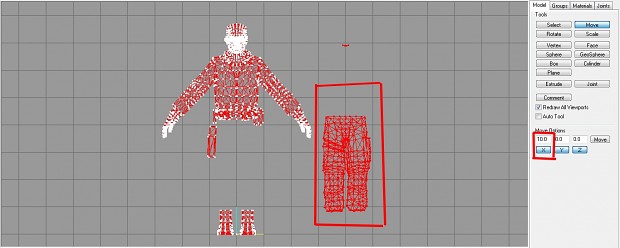
- Go back to MS3D - the selection looks strange does it not? That since we have only some parts selected now.
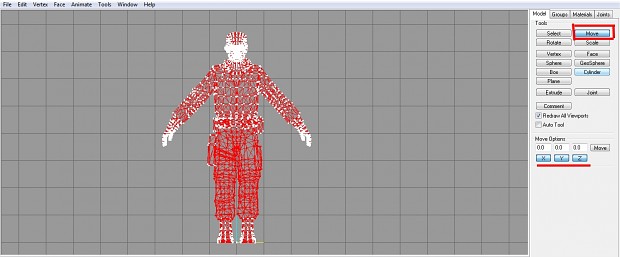
Go to the "Model" section and click the "Move" button. You can move by hand... but then later on you will have to bring back the moved part to the original place... so I prefer to set a value for the move, and then to reverse the value.
Note: I moved ony on the "X" scale and used increments of 10. To get the model back I'll need to move again on "X" with same ammount of increments with value of "-10" (4 times 10 to be exact).
- Go to the "Model" section again and click the "Select" button. Click on the "Face" button and put a tick in "By Vertex" box.
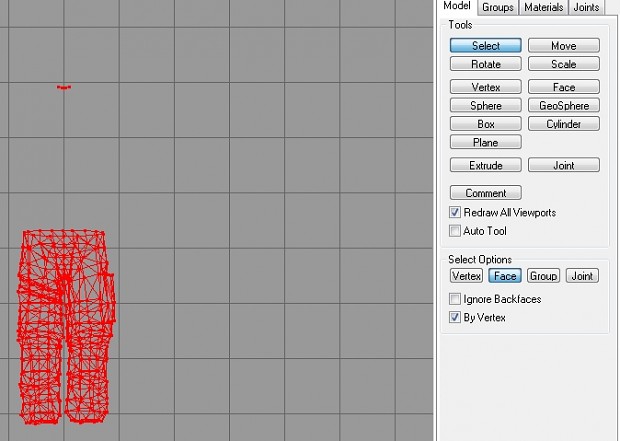
This is needed to select only the parts of the model that we'll regroup.
- After you have selected the desired part, go to the "Groups" section and click on the "Regroup" button. This will create a new group.
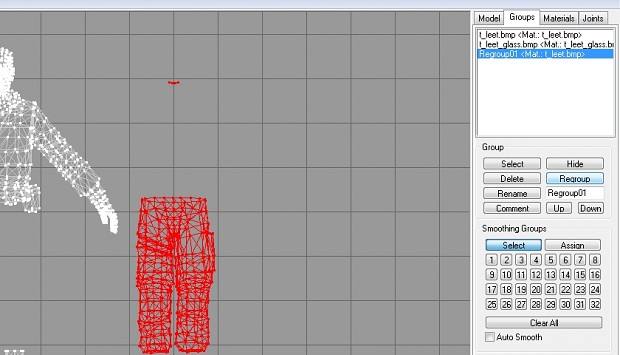
Note: It's important to properly name your new group. If you leave it like this the model will not be compilable.
So in my case I will call it "t_leet_legs.bmp" - the ".bmp" part is also mandatory. After you have put your new name, hit the "Rename" button.
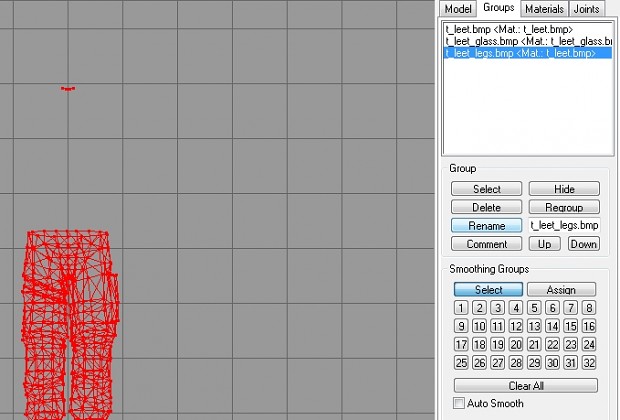 Figure 05: "pants" group in "Groups"
- OK you have your new group, but the texture is still the old one of size 1024x1024. Let's fix that.
Go to PhotoFiltre, select the pants part of the texture with the selection tool and crop it out. OK now I have a new texture with around 512x512 size. Well, yeah you'll probably need to re-scale it, but it's not the same as downscaling 1024x1024 to 512x512...
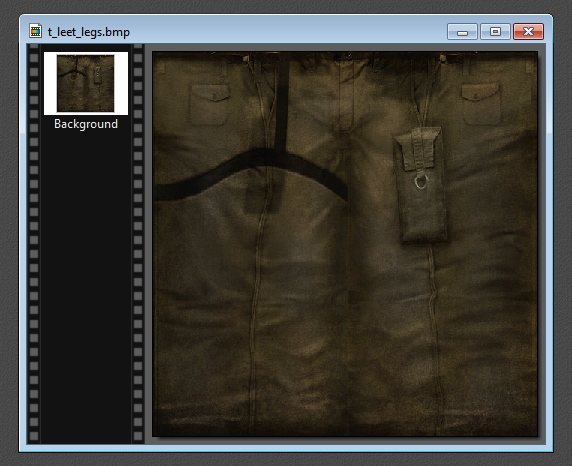 Figure 06: New texture: "t_leet_legs.bmp"
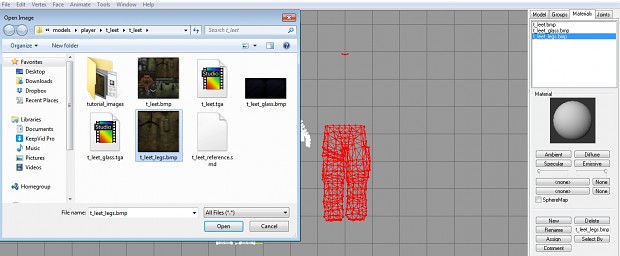
- Go back to MS3D, make sure only the new group is selected. Go to "Materials" tab and create a new material. Click on the "New" button name your new material "t_leet_legs.bmp" - the ".bmp" part is also mandatory.
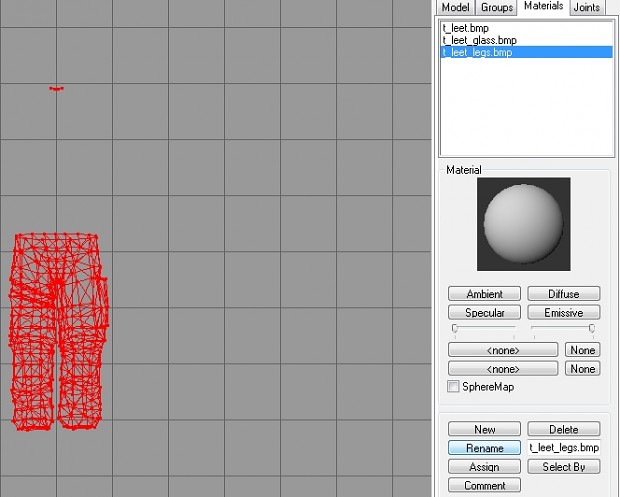 Figure 07: New Material: "t_leet_legs.bmp"
After you have created your new material click on the top button called "
Now you have the texture set for that material. Click on the "Assign" button. Congrats the model part has a new texture applied. You only need to correct the texture coordinates.
- Go back to texture coordinate editor. Select your new material and you'll see that the UV coordinates are looking strange. Lets fix that. Go and click on the "Scale" button and use the mouse to scale up the UVs and to move them at the correct position.
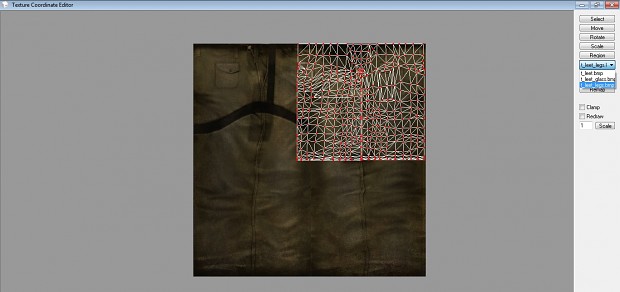 Figure 08: Before Scale
Look here, that is more like it.
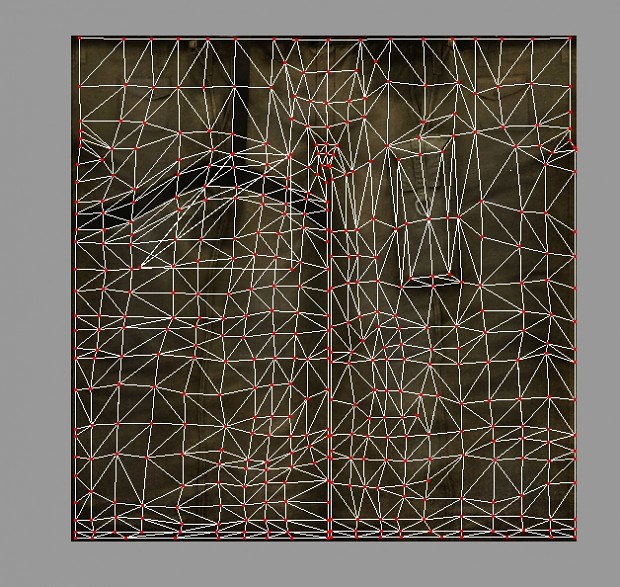 Figure 09: After Scale
- Minimize the "Texture Coordinate Editor" and go to MS3D window. Select the new group and go to the "Model" tab. Click on the "Move" button and put the "X" value to "-10". Move the group until it goes to it's original position (in my case that would be 4 times the value used).

- OK... Now do the same for all other parts of the model. I will leave that part for you and in the next few screenshots I will show you the end result.
Useful Tip: You can select the groups you already "UV Chopped" and click on the "Hide" button. That will help a lot in order not to accidentally select and move or delete something you should not have to selected.
- The final result is below. I have a model that uses 7 textures instead of 2. Furthermore the quality of the original big 1024x1024 texture is preserved trough the technique I just showed you how to use.
So the original texture plus the new 6 UV Chopped textures.
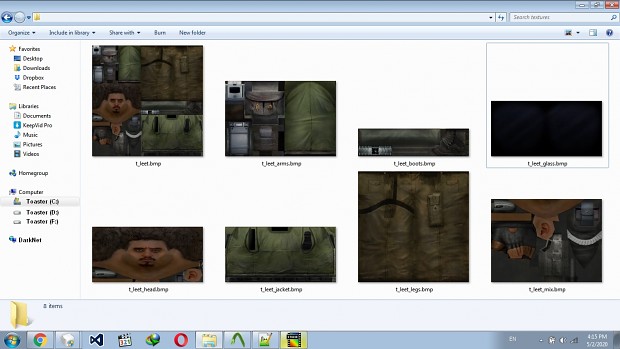 Figure 09: Finished Textures.
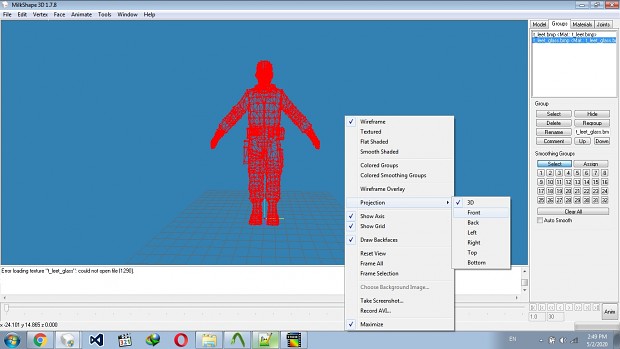
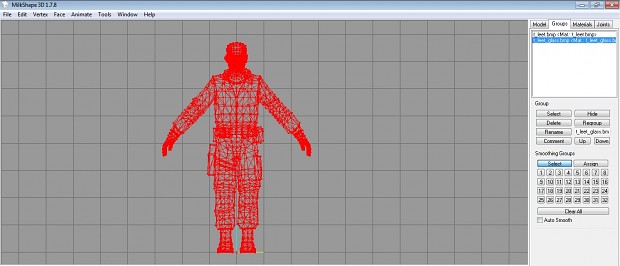
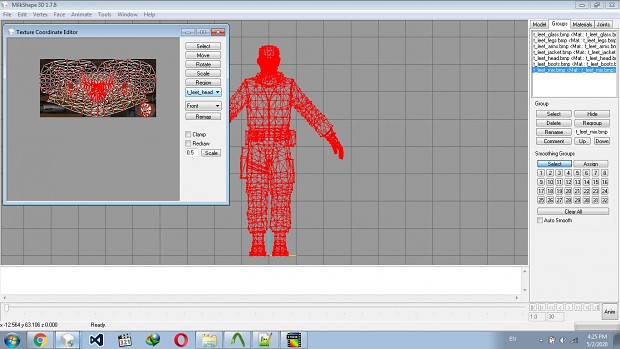 Figure 09: Wireframe view of our UV Chopped model.
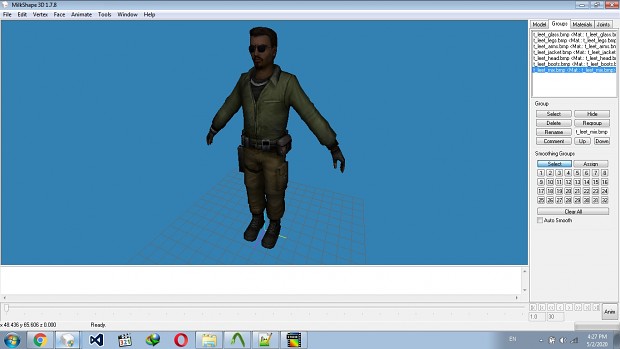 Figure 09: Texture view of our UV Chopped model.
Happy Modding! In the next tutorial I will show you how to use this UV Chopped model am make it to replace the "Barney" or "Hgrunt" monster in Half-Life.
If you don’t like something – MOD it!
Napoleon was here at some undisclosed time in 2021…